There are 4 different modes of USB connection on LG Aristo 3 & Aristo 3 Plus. They are Charging, File Transfer, Photo Transfer & Midi Device. The most useful mode of connection is File Transfer or MTP Mode.
In the File Transfer Mode, along with the photos we can transfer any other file between the phone and the PC. This feature is a boon on an android device. If you’ll switch to iPhone after using an Android device, you’ll feel handicapped due to the lack of MTP file transfer mode.
In this post, we are going to transfer photos, videos and files from LG Aristo 3 / 3 Plus to the computer & vice versa. So, Let’s get going –
How to transfer Pictures & Files from LG Aristo 3 to computer
There are 4 modes of USB connection on LG Aristo 3. Out of these, 2 modes can be used to transfer files, photos & videos between the phone and the computer. Let’s check them out –
LG Aristo 3 File Transfer Mode

To establish a USB connection we have to connect our Aristo 3 to PC using a USB data cable as shown above.

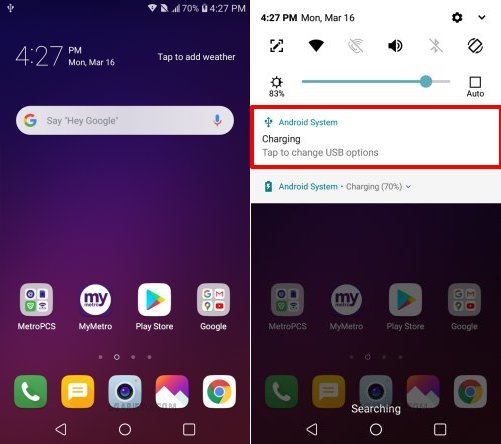
The default mode of the USB connection is “Charging”.
Pull down the notification bar and tap “Charging” as shown above.

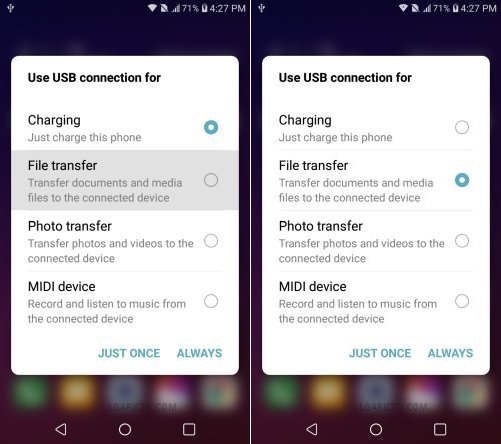
Now among the listed options, we have to choose “File Transfer”.
Select “JUST ONCE” or “ALWAYS” as per your convenience.

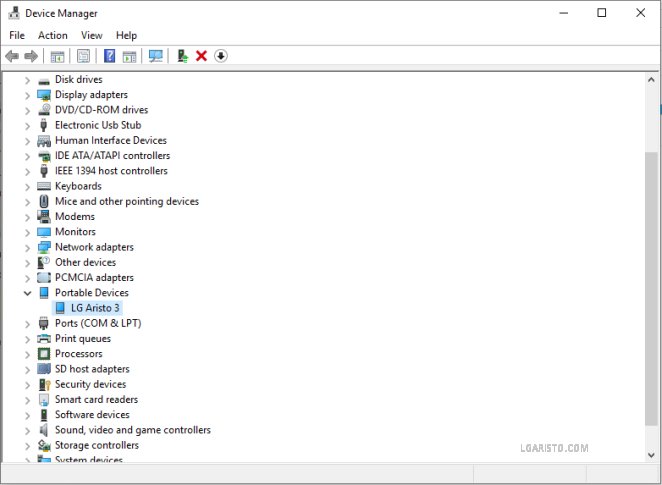
Now, wait for the Aristo 3 driver installation to complete.
After the installation, “LG Aristo 3” is visible under “Portable Devices” in the Device Manager.

A pop-up appears on the screen. It says what to do with this device. Let’s select the 2nd option i.e “Open device to view files”.

As I’ve not inserted a Micro SD card in my Aristo 3, only “Internal Storage” is available. Double-click the “Internal Storage” folder to open it.

The above screenshot shows the files present in the LG Aristo Internal Storage Space.

Let’s try to transfer a file to the “Documents” folder on the computer.
Select the file which you wish to transfer. Right-click and “Copy” the file (or use the keyboard shortcut Ctrl C) as shown above.
I’m trying to transfer the “AnTuTu Benchmark_8.1.8” apk file.

After copying the file, tap “Documents” on the left tab as shown above. Or else you can select any folder on the computer where you wish to transfer this file.

Now, right-click and select “Paste” (or use the keyboard shortcut Ctrl V) to copy the file to this folder.

You can see the “AnTuTu Benchmark_8.1.1.apk” is transferred to the Documents folder.
LG Aristo 3 Photo Transfer Mode

After File Transfer, let’s check out the “Photo Transfer” mode on Aristo 3.
After connecting your phone to PC via USB data cable, select “Photo Transfer” as shown above.
In this mode only “DCIM” and “Pictures” folder is accessible. DCIM folder contains photos and videos captured by the phone camera. The “Pictures” folder stores other image files such as “Screenshots”.

Go to “My Computer” or “This PC” and look for “LG Aristo 3” under “Devices and drives” as shown above.
Right-click, “LG Aristo 3” and select “Import pictures and videos”.

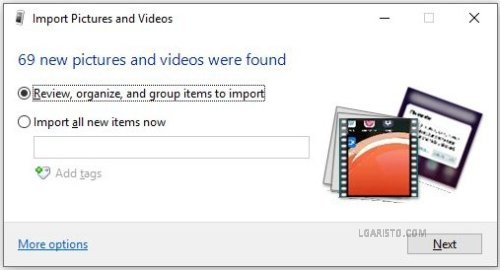
It’s looking for the photos and videos stored in the “DCIM” and “Pictures” folder.

Tap “NEXT” to proceed further.

Tap “Import” to transfer photos and videos from Aristo 3 to PC.

The pictures and videos are getting imported.

The files are successfully imported as shown in the above screenshot.
We can import Photos and Videos in the file transfer mode as well, however, it will pick even system images. So, it’s better to use this feature in the Photo Transfer mode.

Double-click the “LG Aristo 3” device as shown above.

Now click on the “Internal Storage” folder.

In Photo Transfer mode the above 2 folders, DCIM & Pictures are available.
If you don’t wish to import all photos and videos at once, you can open the respective folder and copy/ paste the files manually as done before.
A USB connection between LG Aristo 3 & PC can also be established for unlocking the LG Aristo 3 Bootloader, moving apps to SD Card or to Download & Flash Stock Aristo 3 Firmware using LGUP.
For any query related to an Aristo device, feel free to leave a comment below.