Have you forgotten your LG Aristo 2 (Plus), screen lock PIN, Pattern, or Password? You are not alone. We tend to forget the lock screen details, especially when adding a new & different one. It’s always better to note down the PIN, Pattern, or Password at the time of setting up.
However, if you’re already locked out, we need to find a way out to get past the lock screen. A hard reset would wipe the internal storage data.
First of all, Let’s try to recover our Aristo 2 (Plus), without doing a reset –
How to bypass LG Aristo 2 & Aristo 2 Plus lock screen without reset
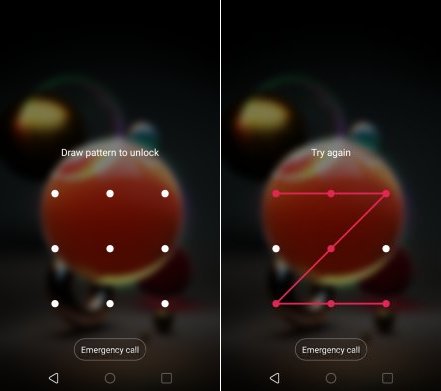
You can see my Aristo 2 is stuck on the pattern lock screen.
I don’t remember the correct pattern lock.
I kept on trying, in the hope to get a recovery option in the form of “Forgot Password” or “Google account sign-in”.
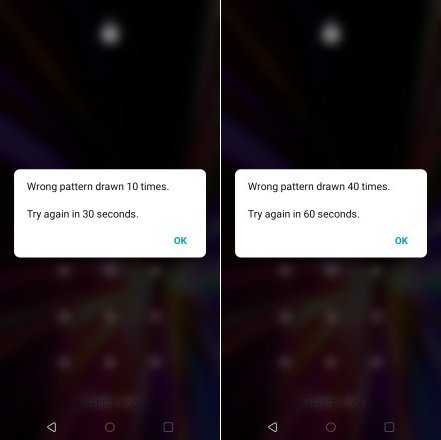
After every few failed attempts the wait time increased.
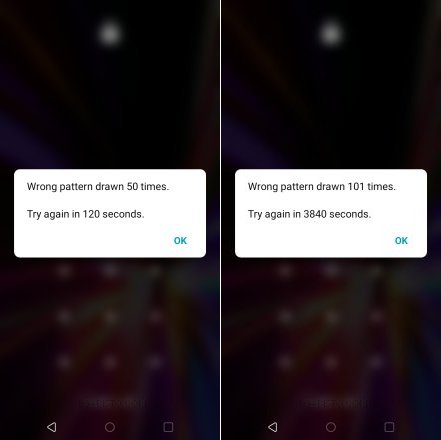
I tried up to 100 pattern lock attempts but to no avail.
After the 100th attempts, it reads “Try again in 3840 seconds”.
This made one thing clear, Aristo 2 screen lock cannot be bypassed without a hard reset.
We need to boot the phone into Recovery Mode to perform a reset.
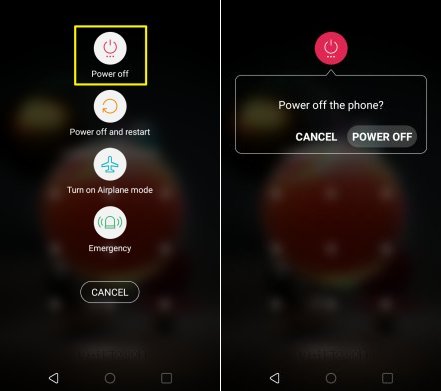
To boot your Aristo 2 (Plus), into Recovery Mode –
- Power off the phone as per the above screenshot.

- Press the volume down + power button to turn on the phone.

- When the LG Logo appears on the screen (or when the phone vibrates), release the power key for a moment and hold it again. Don’t release the volume down button.
- Keep holding both the keys until the phone is on the Factory data reset screen.
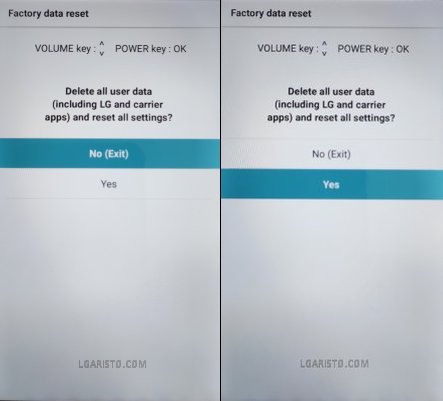
- The above “Factory Data Reset” screen with a white background is known as the Recovery Mode.
In the recovery mode, we can use the volume rocker and power button.
Use the volume down key to move down from “No(Exit)” to “Yes”. Press the Power button to select “Yes”.
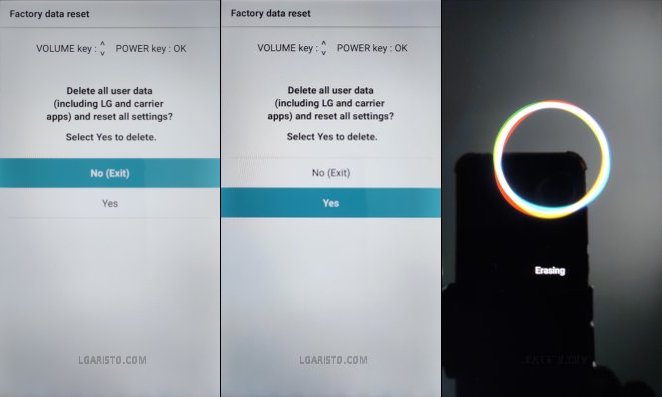
Again move down from “No” to “Yes” and hit the power key to begin the factory reset process.
Wait for a while. The internal storage data is getting erased.
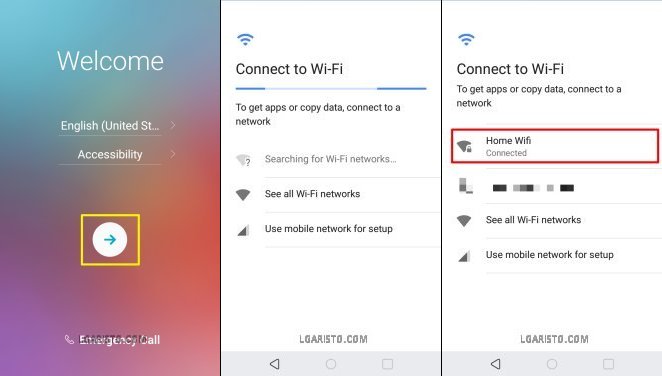
Now, it brings us to the Welcome page.
Use the forward button to move ahead.
Connect to the internet via Wi-Fi or Mobile data.

Select “Set up as new” on the “Copy apps & data” page.
We are once again on the pattern lock screen. This time we get one more option “USE MY GOOGLE ACCOUNT INSTEAD”. Let’s select this alternate option.
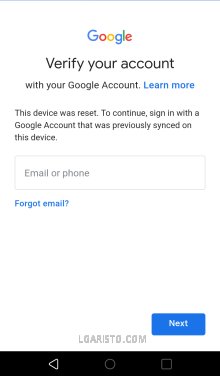
This brings us to the Google Verification page. It’s asking for the last-synced Google account on this device.
If you remember the Google account credentials, sign-in to your account and complete the setup wizard.
In case, you don’t remember the Google account details, follow the below hack to bypass the Google FRP (Factory Reset Protection) lock screen.
How to bypass Google verification on LG Aristo 2 & Aristo 2 Plus

From the Google verification page, go back to the first page of the setup wizard i.e. the Welcome Screen.
Tap “Accessibility” as shown above. When the Accessibility pop-up shows up, hit “SETTINGS”.
We are now on the Accessibility page.
Hit the 2nd last option i.e. “Switch Access”.
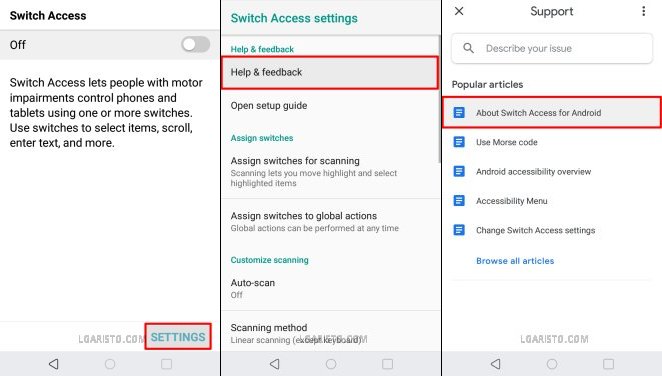
Tap “SETTINGS” located at the bottom-right corner.
This brings us to the “Switch Access settings” page.
Hit the first option “Help & feedback”.
We are now on the Support page. Open “About Switch Access for Android”.

There is a Youtube video on this page.
Tap on the video window and click the “3 dots icon” at the top-right corner.
Now, there are 2 options on the video screen, select “Share” to proceed further.

Tap the youtube video link to get access to the Youtube app.
We are now in the Youtube app.
Tap the “Share” option as marked in the above screenshot.
Use “Email” as the sharing medium.

The email app requires access to contacts, photos, media, and files on your device.
Accept the request by hitting “ALLOW” twice.
Once again hit “Share” on the youtube video page.
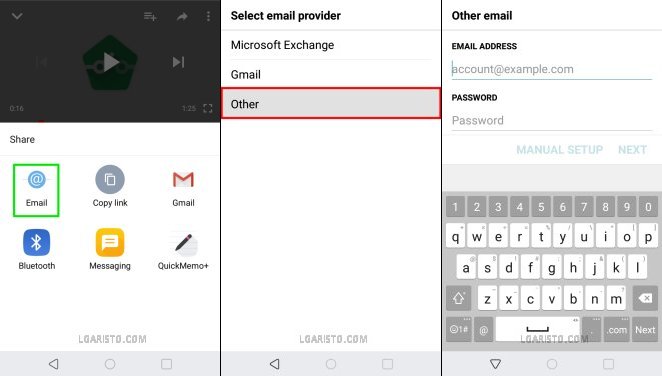
Choose “Email” to share this video.
Now, we are on the “Select email provider” page. Choose the last option i.e. “Other”.
On the next page, it’s asking for the EMAIL ADDRESS & PASSWORD.

Type any email id just to enable the “MANUAL SETUP” option.
Hit”MANUAL SETUP” and select the account type as “Microsoft Exchange”.
This time we are on the “Server Settings” page.
Scroll down and “Add” a “Client certificate” as shown in the above screenshot.
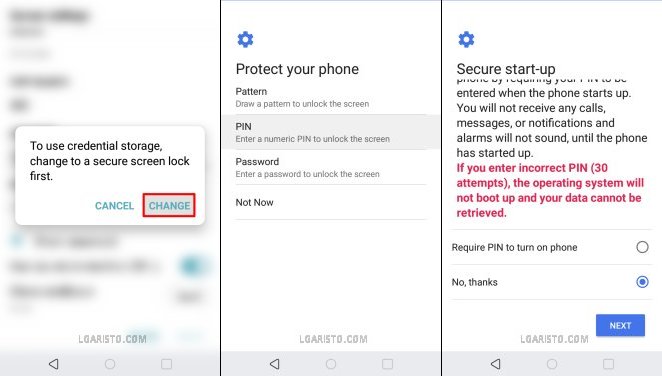
A pop-up appears on the page. It says we need to add a secure screen lock to use credential storage.
Tap “CHANGE” to add a screen lock.
We are now on the “Protect your phone” page. Here we can add a Pattern, PIN, or Password as the screen lock.
This new screen lock will replace the old lock.
Add an easy to remember screen lock.
I’ve chosen the PIN option. Select “No, thanks” on the Secure start-up” page and click “NEXT”.

I’ve added 1234 as the screen PIN.
A confirmation text shows up at the bottom of the screen “Screen lock has been changed”.
We have successfully replaced the old screen lock with a new one.

Now, we are going to restart the phone. Long-press the power button at the back of your Aristo 2 (Plus).

Select “Power off and restart” and wait for the phone to reboot.
We are once again on the “Welcome” screen.
Tap the forward arrow.

Select “Set up as new”.
We are now on the PIN verification page.
Enter the PIN we just created in the last step i.e. 1234 and select “OK”.
This brings us to the Google sign-in page.
As we entered the correct screen PIN, we get to skip Google-sign in.
You can also log in with a Google account. The last-synced account is no more needed.
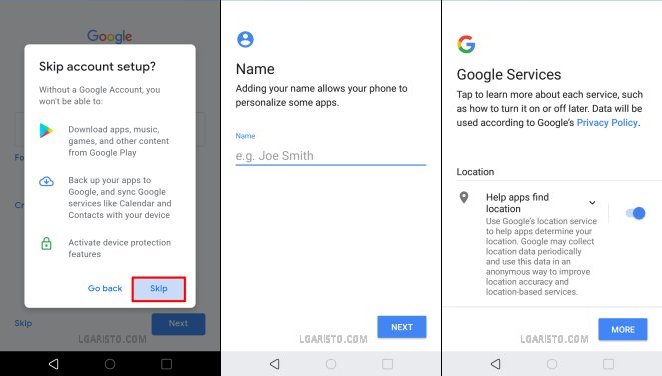
I’m skipping the Google account setup.
Now, we just have to follow the on-screen prompts to finish the setup wizard.
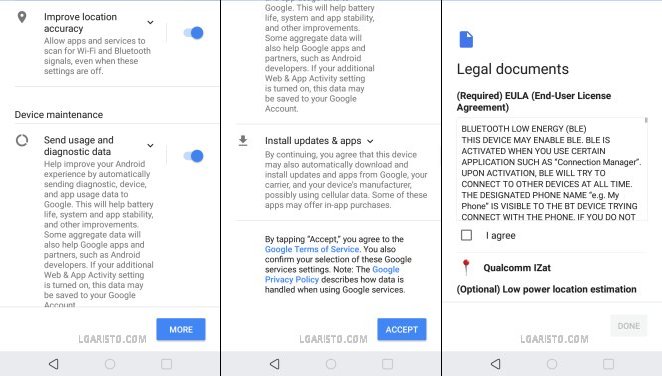
Accept Google services terms and conditions to reach the Legal documents page.

Tick the “I agree” checkbox and select “DONE” to land on the LG Aristo 2 (Plus) home screen.
We have successfully bypassed the LG Aristo 2 (Plus) lock screen.
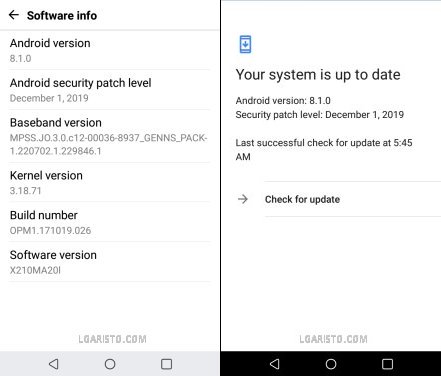
The above FRP bypass method works even on the latest Aristo 2 firmware x210ma20l.
If stuck at any point, feel free to leave a comment below.
damn so all my data is screwed… that sucks never going to trust a lock pattern to have recovery ever again
share button to go to email doesnt work for me
If I do this does it delete all of my old texts and info
Yes, Sure
Youtube needs to be updated
You must have restarted the phone in between. Hard reset once again and repeat the steps.